[教程][原创] Cheat Engine 6.4 Tutorial —— 闯关教程 #5
05 Jan 2015教程 #1: [教程][原创] Cheat Engine 6.4 Tutorial —— 闯关教程 #1
教程 #2: [教程][原创] Cheat Engine 6.4 Tutorial —— 闯关教程 #2
教程 #3:[教程][原创] Cheat Engine 6.4 Tutorial —— 闯关教程 #3
教程 #4:[教程][原创] Cheat Engine 6.4 Tutorial —— 闯关教程 #4
表示写到这里,笔者我都要吐血了…
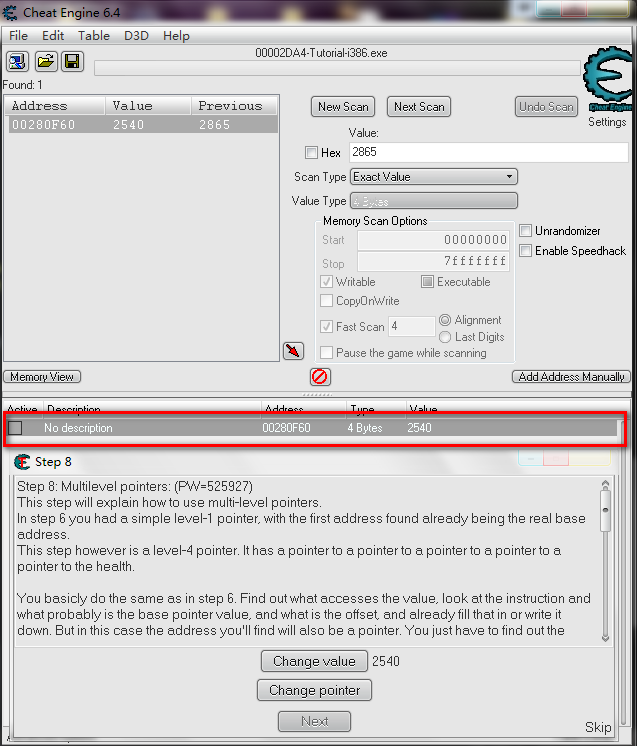
Step 8: Multilevel pointers: (PW=525927) This step will explain how to use multi-level pointers. In step 6 you had a simple level-1 pointer, with the first address found already being the real base address. This step however is a level-4 pointer. It has a pointer to a pointer to a pointer to a pointer to a pointer to the health.
You basicly do the same as in step 6. Find out what accesses the value, look at the instruction and what probably is the base pointer value, and what is the offset, and already fill that in or write it down. But in this case the address you’ll find will also be a pointer. You just have to find out the pointer to that pointer exactly the same way as you did with the value. Find out what accesses that address you found, look at the assembler instruction, note the probable instruction and offset, and use that. and continue till you can’t get any further (usually when the base address is a static address, shown up as green)
Click Change Value to let the tutorial access the health. If you think you’ve found the pointer path click Change Register. The pointers and value will then change and you’ll have 3 seconds to freeze the address to 5000
Extra: This problem can also be solved using a auto assembler script, or using the pointer scanner Extra2: In some situations it is recommended to change ce’s codefinder settings to Access violations when Encountering instructions like mov eax,[eax] since debugregisters show it AFTER it was changed, making it hard to find out the the value of the pointer
Extra3: If you’re still reading. You might notice that when looking at the assembler instructions that the pointer is being read and filled out in the same codeblock (same routine, if you know assembler, look up till the start of the routine). This doesn’t always happen, but can be really useful in finding a pointer when debugging is troublesome
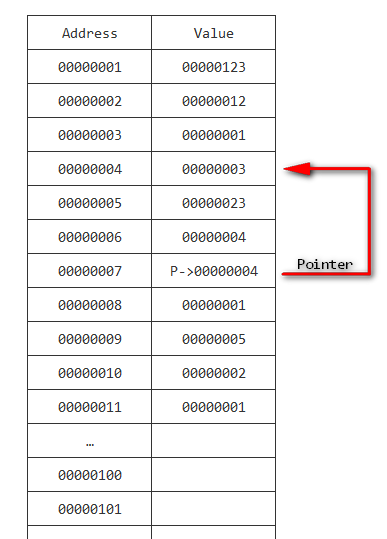
还记得Step 6之中我写到了那个让人头昏脑胀的pointer 吧? (指针)
在Step 6 之中的pointer 其实只是一个level-1 pointer
就是说,指针是直接指向value的地址的
就是这样:
(就用P->来表示一个pointer,还有就没有把那stick man 放进去了 xD )
但是呢,Step 8 是一个多重指针(这里似乎是有4层),就是类似这样(好多层,这里画出来有5层,可是CE Tutorial 写只有4层,不太清楚……)
那要解决这一关呢
非常简单,就是一直重复找(就像Step 6那样,找出access那个address的address),一直重复下去直到找到一个static pointer(等下就会看到这是啥了)
这一关有两种方法可以解决,一个是手动找出地址,另一个呢就是使用pointer scanner。
方法一:手动找出地址
现在就开始啦!
主界面:
界面上还是一样的有一个Change Value 和 Change Pointer 的按钮
功能就不用解释了哈,很直接了
现在第一步骤就是找出Value 的地址:
然后呢,找出什么access to this address:
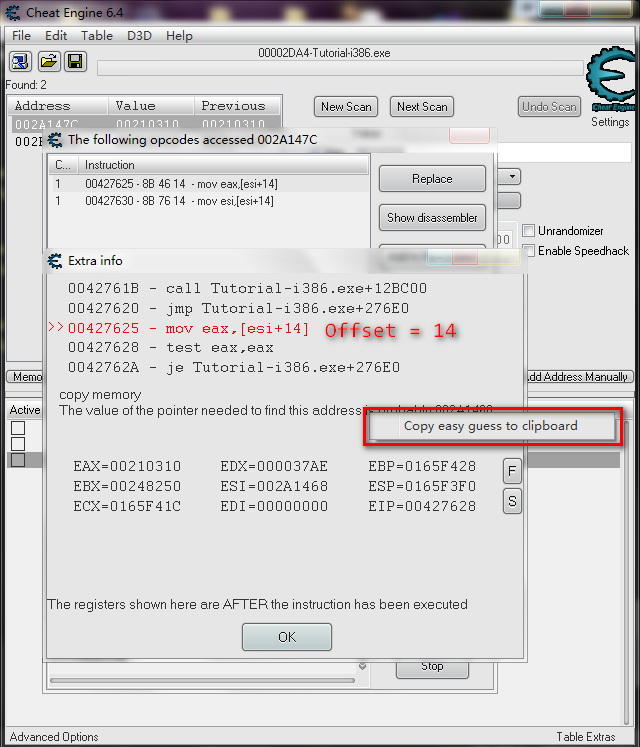
然后我们就看到了两行代码,double click 进入,就能找到pointer 了;
右键点击,copy easy guess:
注意,在这里你有木有发现到有一点点不同?
这里的代码是
mov [esi+18],eax[esi+18]其中的18就是偏移量(Offset),怎么解释呢?
注意:这里的18是16进制的,也就是10进制的24(不过图片里的是10进制的)
这里呢,esi里面保存的是一个地址,但是这个地址不是真正的要指向的地址,18就是的偏移量,只有esi + 18过后才是pointer指向的地址
你要记得,esi是可变的,但是18是一个定量,就是不变的。
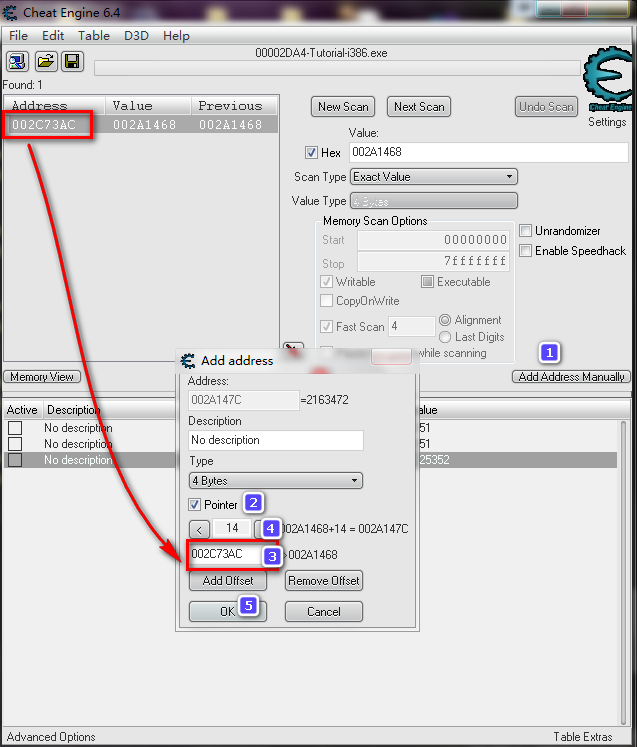
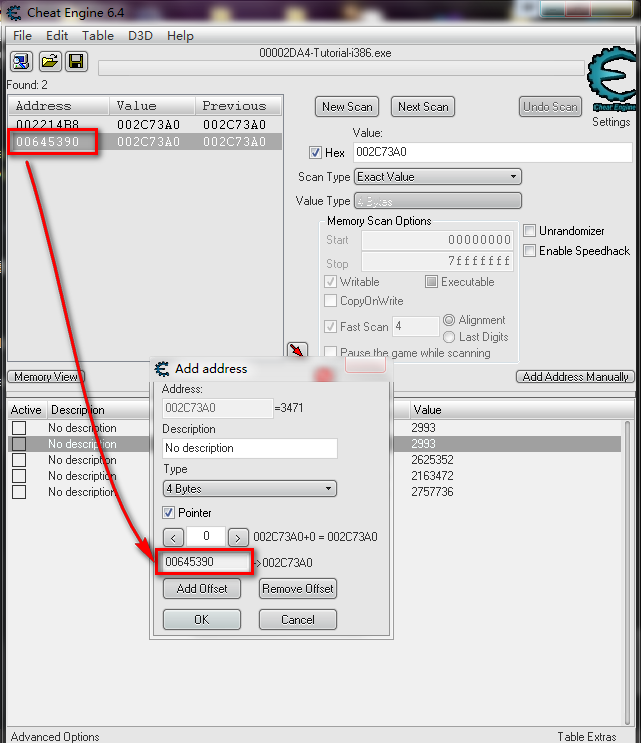
现在呢,找出pointer 的地址(paste入刚才copy的地址):
然后点击下方的Add Address Manually
勾选Pointer
输入找到的地址
然后填入之前记起来的Pointer Offset (这里就是18)
点击OK
只要你看到你的value是跟之前的value是一样的,那你就找对了:
现在就是要找出what access this pointer:
点击Find out what accesses this pointer:
点击Change value之后就会看到多了几个列表项目
双击进入,记下Offset,然后在copy easy guess (在这里Offset = 0):
然后回到CE主界面,再次重复之前的动作:
这里搜索到的有两个,但是通常都选那个地址比较小的(也就是上面那个)
然后就照常Add Address Manually:
注意:这里的value不一样了注意到了吗?这是正常的因为现在value指向的是一个地址
现在再次重复一样的动作:
继续下去,不需要理由 xD (《甜甜的》周杰伦)
现在列表之中有两个,要选哪个呢?特殊状况,解释下先。
有没有发现到列表之中有一个是青色的?
这个就是base address(或者static address,就代表我们找pointer address 到这里就差不多可以停了)
这里呢,直接选择base address的address就能啦(大多数的状况是这样的,但是也有可能有时候不是)
要怎么看你选择的address是正确的呢?
很简单,就是Add Address Manually之后找what accesses this pointer的框框之中没有任何项目就是啦!
比如说我现在选用第一行的项目:
可是就算怎么点击Change Value,列表之中都没有新的项目出现,就代表刚刚的Address是错的:
所以呢,就是用base address了:
到这里呢,就可以停了(只要看到base address,也就是青色的项目列表)
现在我们要做的就是将所有的Offset 都串起来,直接从base address 一直到真正的value
记得我们之前找到的Offset value吧?
依次是c,然后14,然后是0,然后呢就是18
现在呢,点击Add Address Manually,然后pointer address 输入刚刚找到的base address
在上面的框框呢输入c:
然后点击下方的Add Offset,输入14:
然后再点击Add Offset,值保留0:
再点击Add Offset,输入18:
点击OK之后,有木有发现到他的Value跟第一个的项目是一样的?
看回Step 8 的Objective:
If you think you’ve found the pointer path click Change Register. The pointers and value will then change and you’ll have 3 seconds to freeze the address to 5000
直接把他改成5000,然后Freeze:
点击Change Pointer:
然后就点击Next 吧:
方法二:Pointer Scanner
这个方法就灰常灰常简单了
首先就是找出Value的地址:
然后右键点击,选择Pointer scan for this address:
点击OK:
点击Save:
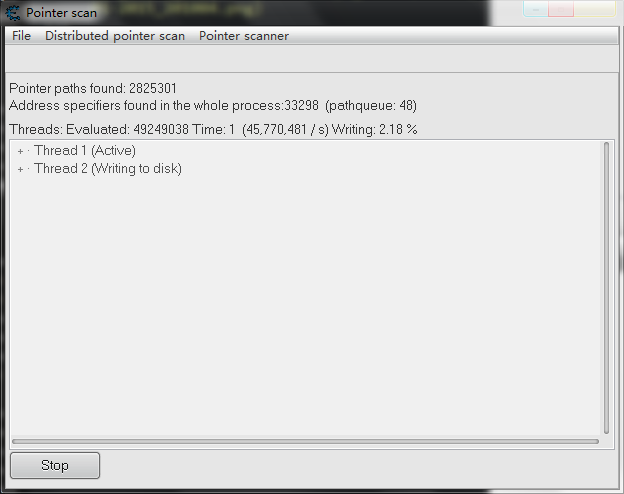
然后CE开始搜索:
结果:
回到CE Tutorial,点击Change Pointer:
然后回到CE 的 Pointer Scan
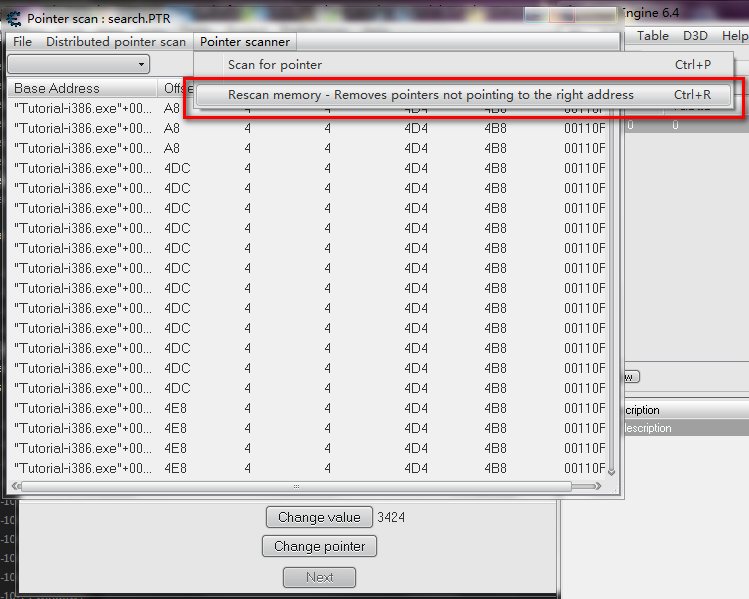
点击Pointer Scanner > Rescan memory - removes pointers not pointing to the right address
选择Value to find
然后输入新的值
点击OK:
点击Save:
稍微的耐心等待之后你就会看到只剩下唯一一个:
双击就会加入到CE的列表之中:
将它改成5000,然后Freeze就好啦!
